- What Is The Two Bucket Car Wash Method (Beginners Guide) - July 2, 2021
- Will Washing Car Remove Wax? What You Need To Know - December 3, 2019
- What Causes Scratches On Car Paint: You Should Know This - April 29, 2019
Last Updated on March 19, 2025 by Nate Schnell
Waxing your car isn’t just about aesthetics; it protects your vehicle’s paint from harsh weather, UV rays, road grime, and minor scratches. While applying wax by hand is common, using a buffer can elevate your results, saving time and effort, especially if you’re after a showroom-quality finish. Whether you’re a seasoned enthusiast or completely new to auto detailing, learning to use a buffer properly can significantly improve your car’s appearance and value.
This detailed, step-by-step guide walks you through how to wax your car using a buffer, explains key differences between waxes, and provides essential tips to prevent damage. By the end, you’ll confidently transform your car into a gleaming masterpiece.
Why Wax Your Car with a Buffer?
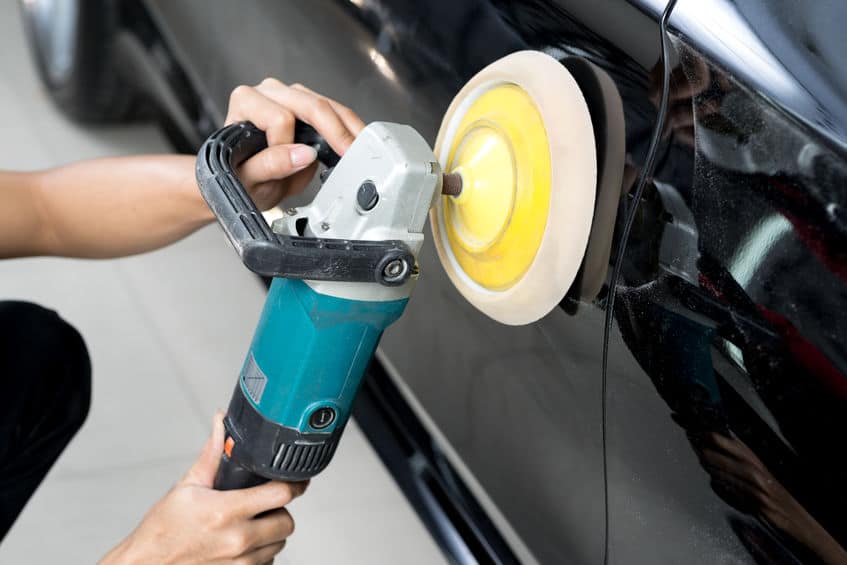
Using a buffer is faster and often yields better results compared to hand waxing. A buffer evenly applies wax, ensuring consistent coverage and minimizing streaks or swirl marks. It also requires less physical effort, making the task easier, especially for larger vehicles. However, improper use can damage your car’s paint, so it’s crucial to understand the right techniques and materials before you begin.
Essential Materials for Waxing with a Buffer
Before you start, gather the following materials:
- Dual-action orbital buffer (highly recommended for beginners)
- Foam finishing pad (also called an applicator pad or waxing pad)
- High-quality liquid wax (easiest and most beginner-friendly)
- Several microfiber towels
- Clay bar (optional, but highly recommended)
- Car wash soap and bucket
- Shade or indoor area to avoid direct sunlight
Choosing a dual-action orbital buffer is essential. These buffers rotate and oscillate simultaneously, significantly reducing the risk of burning through your clear coat compared to a traditional rotary buffer.
Step-by-Step Guide to Waxing Your Car with a Buffer
Step 1: Prepare the Car’s Surface Thoroughly
Preparation is key to achieving professional-level results. Start by washing your vehicle carefully to remove dirt, dust, and contaminants. Pay special attention to the lower parts of the car, wheels, and bumpers—common areas where grime accumulates.
Once clean, run your hand gently across the paint surface. If you feel small bumps or roughness, consider using a clay bar before waxing. Claying your vehicle removes embedded contaminants that regular washing can’t eliminate, resulting in smoother wax application and improved shine.
After washing and claying, dry the car completely using a microfiber towel. Always perform waxing in a shaded or indoor area to avoid direct sunlight, preventing wax from drying prematurely.
Step 2: Apply Wax to the Buffer Pad
Attach a clean foam finishing pad securely to your buffer. Apply five to six small dots of liquid wax evenly spaced around the outer edge of the pad and one slightly larger dot in the center. Avoid using excessive amounts; too much wax can create uneven application and make buffing harder.
Step 3: Apply the Wax with the Buffer
Start by pressing the waxed pad lightly against your vehicle’s paint surface—without turning on the buffer—to spread the wax across the area. Focus on one small section at a time, typically no larger than 2×2 feet.
Turn on the buffer at a low speed, gently working the wax onto the surface using overlapping, straight-line motions. Avoid circular motions, as these can create visible swirl marks. Use only slight pressure; let the buffer do most of the work. The goal is a thin, even coating of wax.
Step 4: Allow Wax to Dry to a Haze
Once you’ve applied wax evenly to a section, allow it to dry according to the manufacturer’s instructions—usually around 5 to 10 minutes. The wax will become hazy when ready. Avoid letting wax sit too long, as this makes removal challenging.
Step 5: Remove the Wax and Buff the Surface
Use a clean microfiber towel to gently wipe away the dried wax. Start lightly, applying just enough pressure to remove the wax residue, working in straight, smooth motions. Flip your towel frequently, or use multiple towels to ensure you’re always working with a clean surface, preventing streaks and scratches.
After removing the wax, gently buff the surface with another clean microfiber towel or a soft buffer pad attachment. Buffing enhances gloss and ensures even coverage, creating a flawless, mirror-like finish.
How Often Should You Wax Your Car?
The frequency of waxing depends on factors such as your environment, weather conditions, and vehicle usage. Typically, applying wax every three to six months is adequate for most cars. Cars regularly exposed to harsh sunlight, rain, snow, or salt may require waxing every two to three months to maintain protection and shine.
A simple test: pour a bit of water onto your car’s surface. If the water beads and rolls off smoothly, your wax is still effective. If it sits or forms large sheets, it’s time for a fresh wax coat.
Choosing the Best Wax: Liquid vs. Paste
There are two main types of wax suitable for buffer application: liquid and paste. Both offer excellent results, but they have key differences:
- Liquid wax is easier to apply, spreads evenly, dries faster, and is beginner-friendly.
- Paste wax is thicker, provides slightly longer-lasting protection, but requires more effort and experience for even application.
For most drivers—especially beginners—liquid wax provides the best balance of ease of use and durability. I recommend Meguiar’s Ultimate Liquid Wax for its durability, ease of application, and exceptional shine.
Car Wax vs. Car Polish: Understanding the Difference
Wax and polish are frequently confused, but they serve distinct purposes:
- Polish is abrasive; it smooths your paint by removing minor scratches, oxidation, and swirl marks, preparing the surface for wax.
- Wax provides a protective layer, shielding the paint from UV rays, dirt, grime, and minor damage, while enhancing the car’s shine.
For the best results, use polish first to correct imperfections, then apply wax for protection and shine.
Common Mistakes to Avoid When Using a Buffer
Using a buffer incorrectly can damage your paint. Here’s how to avoid common errors:
- Avoid pressing too hard: Let the buffer’s weight do the work. Excessive pressure can cause swirl marks or burn the paint.
- Don’t move too quickly: Slow, methodical motions achieve an even wax coating.
- Always work in shade: Direct sunlight can dry wax too quickly, making it challenging to remove and leaving behind residue.
- Use clean materials: Dirty pads or towels can introduce scratches or swirl marks.
Additional Tips to Perfect Your Waxing Technique
If you notice swirl marks or minor imperfections after waxing, consider using a dedicated swirl remover or polish before waxing next time. Waxing alone doesn’t eliminate swirl marks completely but helps minimize their visibility.
To maintain the results of your wax job longer, avoid washing your car with harsh detergents, like dish soap, which can quickly strip the wax. Instead, opt for specialized car wash soaps that clean effectively without removing your protective wax layer.
Recommended Products for Waxing Your Car
Here are some trusted products to help you achieve excellent results:
- Buffer: Porter-Cable Variable Speed Orbital Buffer
- Liquid Wax: Meguiar’s Ultimate Liquid Wax
- Microfiber Towels: Chemical Guys Premium Microfiber Towels
- Clay Bar Kit: Mothers California Gold Clay Kit
Using high-quality materials ensures professional results and long-lasting protection.
Final Thoughts: Wax Like a Pro at Home
Learning how to wax your car with a buffer not only saves you money compared to professional detailing services but also provides significant satisfaction and a sense of pride. Done correctly, waxing your vehicle at home offers unbeatable protection and shine, preserving your car’s beauty and resale value.
With patience, practice, and the right materials, anyone can achieve a stunning, professional-quality finish at home. Happy waxing!