- What Is The Two Bucket Car Wash Method (Beginners Guide) - July 2, 2021
- Will Washing Car Remove Wax? What You Need To Know - December 3, 2019
- What Causes Scratches On Car Paint: You Should Know This - April 29, 2019
Last Updated on March 20, 2025 by Nate Schnell
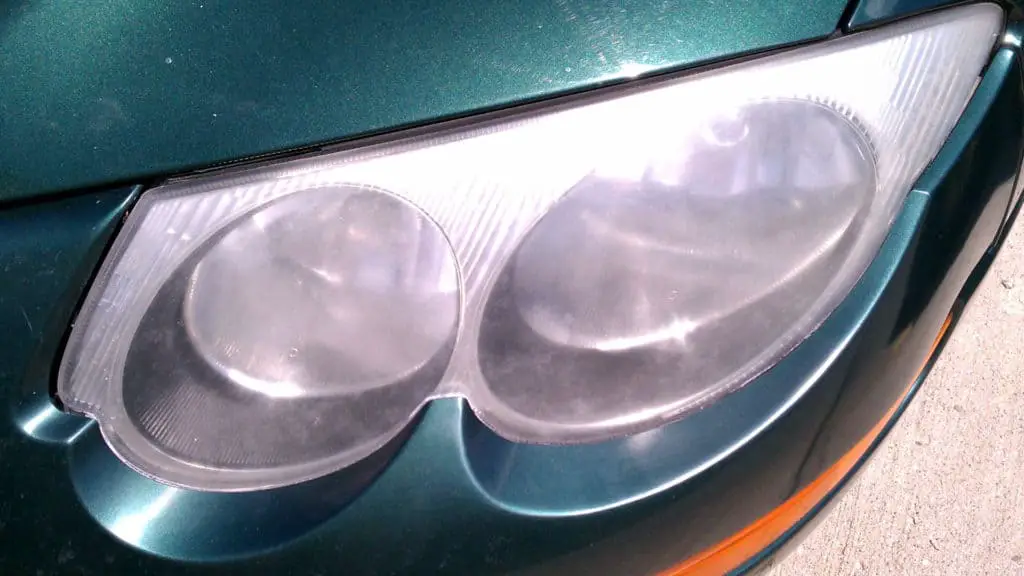
Your car may be spotless from top to bottom, but yellowed, faded headlights can ruin the entire appearance. Beyond aesthetics, cloudy headlights reduce visibility at night, creating a serious safety hazard. The good news? Restoring your headlights to crystal-clear condition can be quick, easy, and affordable—no professional experience required.
There are two proven methods for restoring headlights: the quick plastic restoration method, which works on mildly faded lights, and the deeper restoration method, ideal for heavily yellowed or cloudy lenses. Let’s explore each method in detail, helping you determine exactly which one your car needs.
Why Do Car Headlights Fade?
Your car’s headlights are typically made of polycarbonate plastic—strong, lightweight, and durable. However, this plastic can degrade under constant exposure to UV rays from the sun. Although manufacturers apply protective coatings to help block UV damage, these coatings wear away over time, leaving the plastic vulnerable. As a result, headlights on older cars often become yellowed, cloudy, or foggy.
Regular exposure to sunlight and environmental pollutants accelerates this damage. That’s why applying a protective coating after restoration is essential to maintaining clear headlights long-term.
Method 1: Quick and Easy Restoration for Mildly Faded Headlights
This method is perfect if your headlights have recently started looking dull or yellowish. It’s quick, easy, and cost-effective, often taking just a few minutes per headlight. Even better, you only need a few common materials:
- A quality plastic restorer (such as Meguiar’s PlastX)
- Two microfiber towels
- Car wash soap
- Car wax or headlight coating for protection
Step One: Clean the Headlights Thoroughly
Before starting, wash your headlights thoroughly with car wash soap and warm water to remove dirt, debris, and grime. Rinse well, then dry completely with a microfiber towel. If your headlights have stubborn dirt or bugs stuck to the surface, using a clay bar can easily remove these contaminants.
Step Two: Restore the Clarity with PlastX
Next, apply a small, quarter-sized amount of Meguiar’s PlastX onto a clean microfiber towel. Gently but firmly rub the product into the headlight in circular motions, covering the entire lens surface. Spend about 1-2 minutes per lens, applying moderate pressure. This process polishes away the thin layer of oxidation and haziness.
After rubbing thoroughly, use the other side of your towel (or a fresh towel) to buff away any remaining residue, leaving behind a clear, restored headlight.
You might need to repeat this step two or three times for heavily faded headlights. However, if multiple applications don’t deliver satisfactory results, move on to method two.
Step Three: Protecting Your Restored Headlights
To maintain clarity and protect against future UV damage, apply a high-quality car wax or headlight sealant. Waxes like Meguiar’s Ultimate Paste Wax or dedicated UV sealants like Meguiar’s Keep Clear Headlight Coating provide effective protection. Regular reapplication every few months will help your headlights remain clear for much longer.
Also, parking in shaded areas or covering your car helps slow UV-related fading.
Method 2: Deep Restoration for Severely Cloudy Headlights
If your headlights are severely clouded or yellowed, the quick method above won’t be sufficient. In this case, you’ll need a headlight restoration kit—such as the 3M Headlight Lens Restoration System. This method is more involved, taking about 30-45 minutes, but the results can be dramatic.
Here’s what you’ll need:
- 3M Headlight Restoration Kit
- Microfiber towels
- Spray bottle with water (for rinsing during sanding)
Step One: Apply Surface Activator
Start by spraying the provided surface activator generously onto the headlights. Allow it to soak for about 30 seconds, which helps loosen the oxidized plastic layer and prepares the lens surface for sanding and polishing. After waiting, rinse thoroughly with water and wipe dry.
Step Two: Sanding and Polishing to Restore Clarity
The restoration kit includes several sanding discs of varying grit levels. Starting with the coarsest sandpaper, lightly sand the lens surface using even, horizontal strokes, frequently spraying with water to keep the surface lubricated. Gradually move up to finer-grit sandpapers provided in the kit, sanding gently to remove deeper scratches and oxidation. This careful sanding removes the damaged surface layer, revealing fresh, clear plastic beneath.
After sanding, use the included polishing pad and polish compound to restore the lens to a smooth, crystal-clear finish. Be thorough, taking your time to achieve the best clarity possible.
Step Three: Apply UV Block Coating
Once your headlights are clear, it’s essential to protect them from future fading. The kit includes a UV-block clear coat designed specifically to shield your headlights from UV damage. Apply this coating evenly across the lens surface, carefully following the manufacturer’s instructions. Let it dry fully, usually about 30 minutes, before driving.
Applying this UV coating properly is crucial—it prolongs the results of your restoration, keeping your headlights clear and protected for years.
Important Safety Considerations
Always mask around your headlights with painter’s tape to avoid accidentally sanding or polishing your car’s paint. Additionally, make sure you follow the manufacturer’s instructions closely, particularly during sanding, to avoid uneven results.
Tips for Maintaining Clear Headlights Long-Term
To keep your headlights clear:
- Reapply protective coatings regularly (every 3-6 months)
- Regularly wash your car, especially headlights, removing dirt and grime that accelerate deterioration
- Park in the shade or use a car cover when possible
- Wax headlights along with your car’s bodywork for additional protection
Which Method is Right for You?
Start with Method One, as it’s quick and often effective enough for lightly faded headlights. If results aren’t satisfactory after a few attempts, move on to Method Two, which reliably restores even severely faded lenses.
By following these simple steps, you’ll restore the clarity of your car’s headlights, significantly improving your vehicle’s appearance, visibility, and safety on the road.