

Last Updated on September 22, 2023 by Chase Manhattan

- How to Clean Car Carpets Quick and Easy - July 10, 2024
- Can You Touch Up Clear Coat? Yes and No (Here’s Why) - November 25, 2023
- How To Wax A Car By Hand: A Comprehensive Guide - November 14, 2023
Have you ever glanced at the plastic interior of your car, cringing at the gunk and grime that’s been building up? You’re not alone. Modeling a clean car interior might seem like an arduous task, but it’s not when you have the right guidance. Welcome to the ultimate guide on How To Clean The Plastic Interior Of A Car!
Here, we unravel the secret to a spotless car environment safely and efficiently. It’s a quick, easy process that just needs your will and a little bit of elbow grease. So let’s get started on this transformative journey to restore your car to its former glory!
Quick Navigation
What Should I Know Before Starting?
Before embarking on this cleaning journey, it’s important to understand that the plastic parts of your car’s interior require special attention. They can easily accumulate dirt and, over time, can become dull due to wear and tear.
The cleaning process does not only involve wiping off the dust; it also includes treating the plastic to restore its original shine and prevent future damage. Therefore, you need to be equipped with the right cleaning products and techniques to achieve the best results.
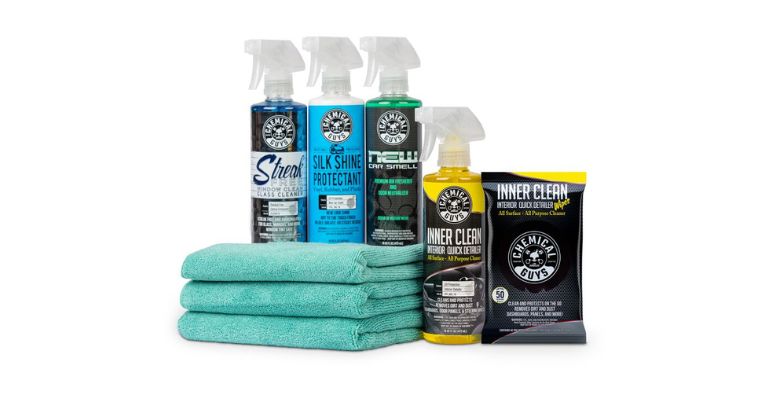
Needed Supplies
Here’s a list of supplies you’ll need to clean the interior plastic of your car:
- Microfiber cloths
- Vacuum cleaner
- Interior cleaner or all-purpose cleaner
- Soft-bristled brush
- Water and vinegar (optional)
- Plastic protectant (optional)
Each of these items plays a vital role in the cleaning process, ensuring that the plastic surfaces of your car’s interior are thoroughly cleaned and protected.
How To Prepare The Car and Surrounding Area
Before you start cleaning, it’s crucial to prepare your car and the surrounding area to prevent any potential damage.
- Park your car in a shaded area: Too much direct sunlight can cause the cleaning products to dry too quickly, leaving streaks and spots on the plastic surfaces.
- Remove loose items: Clear out any loose items from your car’s interior to make the cleaning process easier and more effective.
- Dust off the surfaces: Use a dry microfiber cloth to dust off the plastic surfaces. This will remove any loose dust and dirt, making the cleaning process easier.
Best Way To Clean A Plastic Interior (Step-by-Step)
Cleaning the plastic interior of your car involves a series of steps. Here’s the step-by-step process:
- Vacuum the surfaces: Use a vacuum cleaner to remove any loose dirt and dust from the plastic surfaces. This will make the cleaning process more effective.
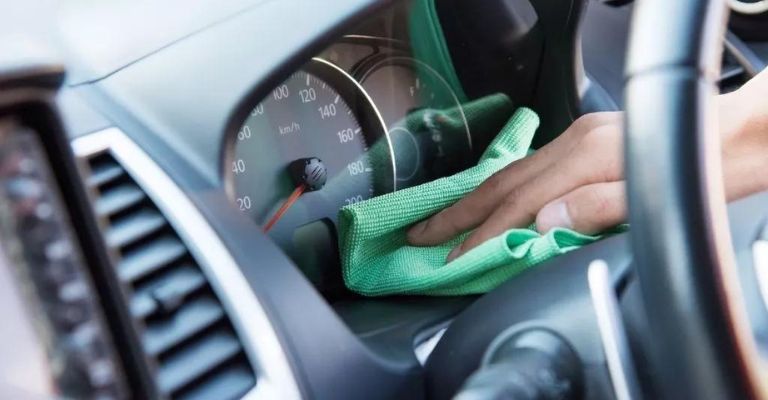
- Apply cleaner: Spray your preferred cleaner onto a microfiber cloth and gently wipe the plastic surfaces. Avoid spraying the cleaner directly onto the surfaces to prevent any potential damage.
- Clean the surfaces: Use a soft-bristled brush to scrub the surfaces gently. This will help remove any stubborn dirt and grime that’s stuck on the surface.
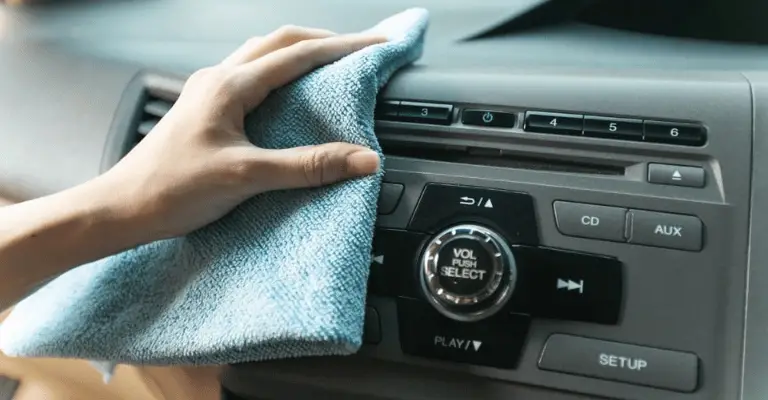
- Wipe down the surfaces: After cleaning, use a dry microfiber cloth to wipe down the surfaces, removing any leftover cleaner and dirt.
- Apply plastic protectant (optional): If you want to give your car’s interior plastic a shiny finish, you can apply a plastic protectant. Just spray it onto a microfiber cloth and wipe it onto the surfaces.
How Can I Treat The Plastic After It’s Clean?
After cleaning the plastic interior of your car, you can treat it with a plastic restorer or protectant. This will help restore the plastic’s original shine and protect it from future damage.
There are various plastic restorer kits available in the market that include a cleaner, a restorer, and a protectant. These kits are designed to clean, restore, and protect your car’s interior plastic, keeping it looking new and fresh.
What Other Methods Can I Use To Clean The Plastic Interior?
Apart from the standard cleaning method, there are other techniques that you can use to clean the interior plastic of your car:
DIY Cleaning Solution: You can make a homemade cleaning solution using vinegar and water. Mix equal parts of vinegar and water and apply it to the plastic surfaces using a microfiber cloth. This is an effective and eco-friendly cleaning solution that can remove dirt and grime from your car’s interior plastic.
Steam Cleaning: Steam cleaning is another effective method for cleaning the interior plastic of your car. It uses steam to remove dirt and grime, leaving your car’s interior plastic clean and fresh. However, this method requires a steam cleaner, which can be quite expensive.
How To Approach Different Interior Plastic Surfaces
Different interior plastic surfaces may require slightly different cleaning methods:
- Black Interior Plastics: Black plastic surfaces can show dust and dirt easily. Therefore, regular cleaning with a microfiber cloth and an all-purpose cleaner is essential.
- Interior Plastic Trim: The interior plastic trim can be delicate. A gentle cleaner, like a mixture of water and vinegar, is recommended for cleaning this surface.
- Hard Interior Plastics: Hard plastic surfaces, like the dashboard, can be tougher to clean. Using an all-purpose cleaner and a soft-bristled brush can help remove stubborn dirt and grime.
Recap of Cleaning Methods
To recap, here are the different methods you can use to clean the interior plastic of your car:
- Standard Cleaning: This involves vacuuming the surfaces, applying a cleaner, cleaning the surfaces, and wiping them down.
- DIY Cleaning Solution: This involves using a homemade cleaning solution made of vinegar and water.
- Steam Cleaning: This involves using a steam cleaner to clean the surfaces.
- Plastic Restorer Kit: This involves using a kit that includes a cleaner, a restorer, and a protectant.
Ending Thoughts
Maintaining the cleanliness and shine of your car’s interior plastic is an ongoing task that requires the right cleaning products and techniques. Whether you choose to use a standard cleaning method or a DIY cleaning solution, it’s important to clean your car’s interior plastic regularly to keep it looking new and fresh.
FAQs
How often should I clean the interior plastic of my car?
It’s recommended to clean the interior plastic of your car at least once a month. However, this can vary depending on how often you use your car and the conditions it’s exposed to.
Can I use household cleaners to clean the interior plastic of my car?
While some household cleaners can be used to clean the interior plastic of your car, it’s important to ensure that they are safe for use on plastic surfaces. Always test a small amount on a hidden area first to ensure it doesn’t cause any damage.
Can I use a plastic restorer on all types of interior plastic?
Most plastic restorers are safe to use on all types of interior plastic. However, it’s always a good idea to check the product’s label or consult the manufacturer to ensure it’s safe for use on your specific type of plastic.
Remember, learning how to clean the plastic interior of a car not only keeps your vehicle looking great, but it also helps maintain its value. Happy cleaning!
