
- How to Clean Car Carpets Quickly (Without An Extractor) - July 10, 2024
- Can You Touch Up Clear Coat On A Car? Yes and No (Here’s Why) - November 25, 2023
- How To Wax A Car By Hand (For Beginners) - November 14, 2023
Last Updated on December 10, 2024 by Nate Schnell
Does the interior plastic in your car look faded, scratched, or generally tired? If so, restoring it is easier than you think and can make a huge difference in how your vehicle looks and feels. Interior plastic restoration is more than a cosmetic upgrade; it’s about maintaining your car’s overall value and ensuring a better driving experience. Whether you’re dealing with faded door panels, scratched dashboards, or dull center consoles, this guide will help you restore those surfaces to their former glory.
Why Restoring Car Interior Plastic Is Important
The interior plastic of a car doesn’t just contribute to its visual appeal—it also plays a role in preserving the vehicle’s value. Over time, plastic surfaces can fade, scratch, and accumulate grime due to sun exposure, wear and tear, and everyday use. While this may seem like a minor issue, a well-maintained interior can make your car more enjoyable to drive and increase its resale value. A clean, well-preserved cabin gives the impression that the vehicle has been cared for, which is important whether you’re keeping it for years or planning to sell.
Understanding Common Plastic Damage
Car interior plastics face several types of damage over time. Fading is one of the most common issues, caused by constant exposure to sunlight, which breaks down the pigments in the plastic. Scratches are another frequent problem, often caused by rings, keys, or sharp objects. Stains from spills, dirt, or oils can also accumulate, leaving the plastic looking grimy or discolored. Each of these issues requires a slightly different approach to restore the surface effectively.
Preparing to Restore Plastic
Before jumping into the restoration process, preparation is key. Start by thoroughly cleaning the plastic surfaces to remove any dirt, grease, or dust that could interfere with the restoration products. A good automotive interior cleaner and a microfiber cloth are perfect for this step. Avoid harsh cleaners that might damage the plastic or leave residue behind.
If you’re dealing with particularly stubborn dirt, a soft-bristled brush can help agitate the grime without scratching the surface. Be sure to let the surface dry completely before moving on to the next step.
Steps to Restore Interior Plastic
Restoring your car’s interior plastic is a multi-step process that requires patience and attention to detail. Here’s how to do it:
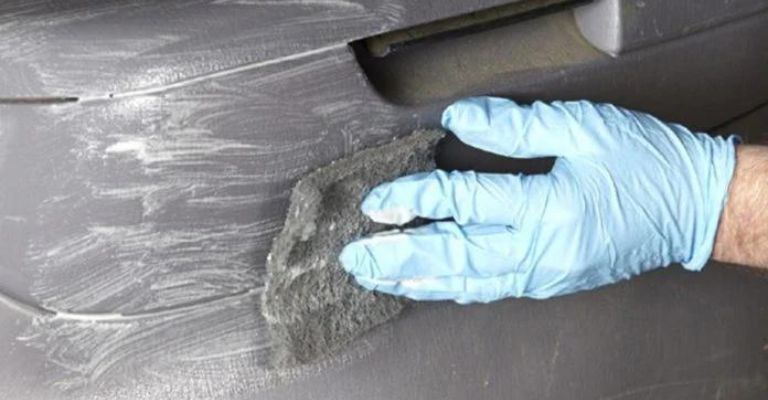
Clean the Surface
Thoroughly clean the plastic with an automotive cleaner and a microfiber cloth. This removes dirt, grime, and oils that could interfere with restoration products. For particularly dirty areas, scrub gently with a soft-bristled brush.
Address Scratches
For light scratches, buff the area with a mild abrasive like baking soda mixed with water or even a dab of toothpaste. Rub the mixture in with a microfiber cloth, then wipe it clean. For deeper scratches, use a plastic scratch repair kit, which typically includes a filler and color-matching compound to blend the repair seamlessly into the surrounding surface.
Apply Plastic Restorer
Plastic restorers are specially formulated to rejuvenate faded surfaces, restoring their color and luster. Apply a small amount of restorer to a clean microfiber cloth, then rub it evenly into the plastic. Pay extra attention to heavily faded or discolored areas. Allow the product to soak in for several minutes before buffing it with a dry cloth for a smooth finish.
Protect the Surface
Once the plastic has been restored, applying a UV protectant can help keep it looking great for longer. This step is especially important for surfaces exposed to direct sunlight, as UV rays are a primary cause of fading.
Alternative Restoration Methods
If a plastic restorer isn’t available, there are other methods you can use to bring back the shine and color to your car’s interior plastic.
One popular method involves using a heat gun. By carefully heating the surface, the oils in the plastic are brought to the surface, restoring its original color. However, this method requires caution, as excessive heat can warp or damage the plastic. It’s best to test this technique on a small, inconspicuous area first.
Painting is another option for severely faded or damaged plastic. Using a paint specifically designed for automotive interiors, you can completely refresh the look of your car’s cabin. Be sure to clean and prep the surface thoroughly before applying paint, and follow up with a sealant for added durability.
Maintaining Restored Plastic
Restoring your car’s interior plastic is only the first step—keeping it looking great requires ongoing care. Regular cleaning with a gentle automotive cleaner prevents dirt and grime from building up, while reapplying a UV protectant every few months helps ward off fading.
Avoid abrasive tools or harsh chemicals when cleaning, as these can scratch or discolor the plastic. If you notice new scratches or areas of fading, address them promptly to prevent the damage from worsening.
Frequently Asked Questions
What’s the best way to clean car interior plastic before restoring it?
Use a microfiber cloth and an automotive cleaner to gently clean the surface. Avoid spraying the cleaner directly onto the plastic—apply it to the cloth first.
Can I use household cleaners on car interior plastic?
It’s better to avoid household cleaners, as many contain harsh chemicals that can damage the plastic. Stick to products designed for automotive interiors.
How long does plastic restoration last?
The longevity of your restoration depends on the quality of the product used and how well you maintain the surfaces. Applying a UV protectant regularly can extend the results for up to a year.
Is painting a good option for restoring faded plastic?
Yes, painting is a great option for severely damaged or discolored plastic. Use a paint formulated for automotive interiors, and follow the manufacturer’s instructions for the best results.
What if I accidentally damage the plastic during restoration?
If damage occurs, stop and reassess the technique or product being used. For severe damage, consider replacing the affected part or consulting a professional.
Final Thoughts
Restoring the plastic interior of your car is an investment in both aesthetics and value. With the right products and techniques, you can transform faded, scratched, or stained plastic into surfaces that look nearly new. Whether you choose to use a restorer, repair scratches, or even repaint, the effort you put in will be well worth it. Regular cleaning and UV protection will keep your interior looking great for years to come, ensuring you always enjoy a fresh, polished cabin every time you get behind the wheel.